

I think most people find binding the hardest part of making a quilt, so in today’s post I’m taking you through each step and showing you exactly how I do it. We’re not finishing it off the traditional way, matching up the ends on the diagonal, we’ve got a sneaky little trick to make that last bit easier. I’ve also changed up a few things about how I bind compared to my older videos. Take what you like from those, take what you like from this one, and work out what binding method suits you best!
What You’ll Need
- Binding fabric, cut into strips (I cut mine at 2½”)
- Rotary cutter and cutting mat
- Quilting Ruler
- Iron and pressing surface
- Sewing machine with a quarter-inch foot (a walking foot works well too)
- Pins or clips
- Optional: the free Robert Kaufman quilting calculator app, to work out exactly how many strips you need
Cutting and Calculating Your Strips
Cut your binding strips at whatever width you prefer, I always cut mine at 2½”. If you’re not sure how many strips you’ll need for your quilt, the Robert Kaufman quilting calculator app makes it painless. Just enter your strip width and your quilt’s dimensions and it tells you exactly how many strips to cut, no more running short halfway around!

Step-by-Step Binding Instructions
Step 1: Join Your Strips on the Diagonal (the Fail-Proof Way)
This is the step that trips a lot of people up, so here’s the trick that makes it foolproof for me. I use the printed lines on my cutting mat as a guide.
- Lay your first strip right side up, lined up on a line on your mat.
- Lay your second strip right sides together on top, this time lined up on the vertical line on your mat.
- Because both strips are squared up to the mat’s grid, they’ll be perfectly straight once joined, no wonky strips!
- Draw a diagonal line from corner to corner with your ruler, that’s your stitching line.
- Pop in a couple of pins to hold everything steady, then sew along the line.

- Trim the excess a quarter inch from your stitching (I use my rotary cutter lined up on the ruler’s quarter-inch line, but scissors by eye work too), and trim off the little “dog ears” left at the corners.

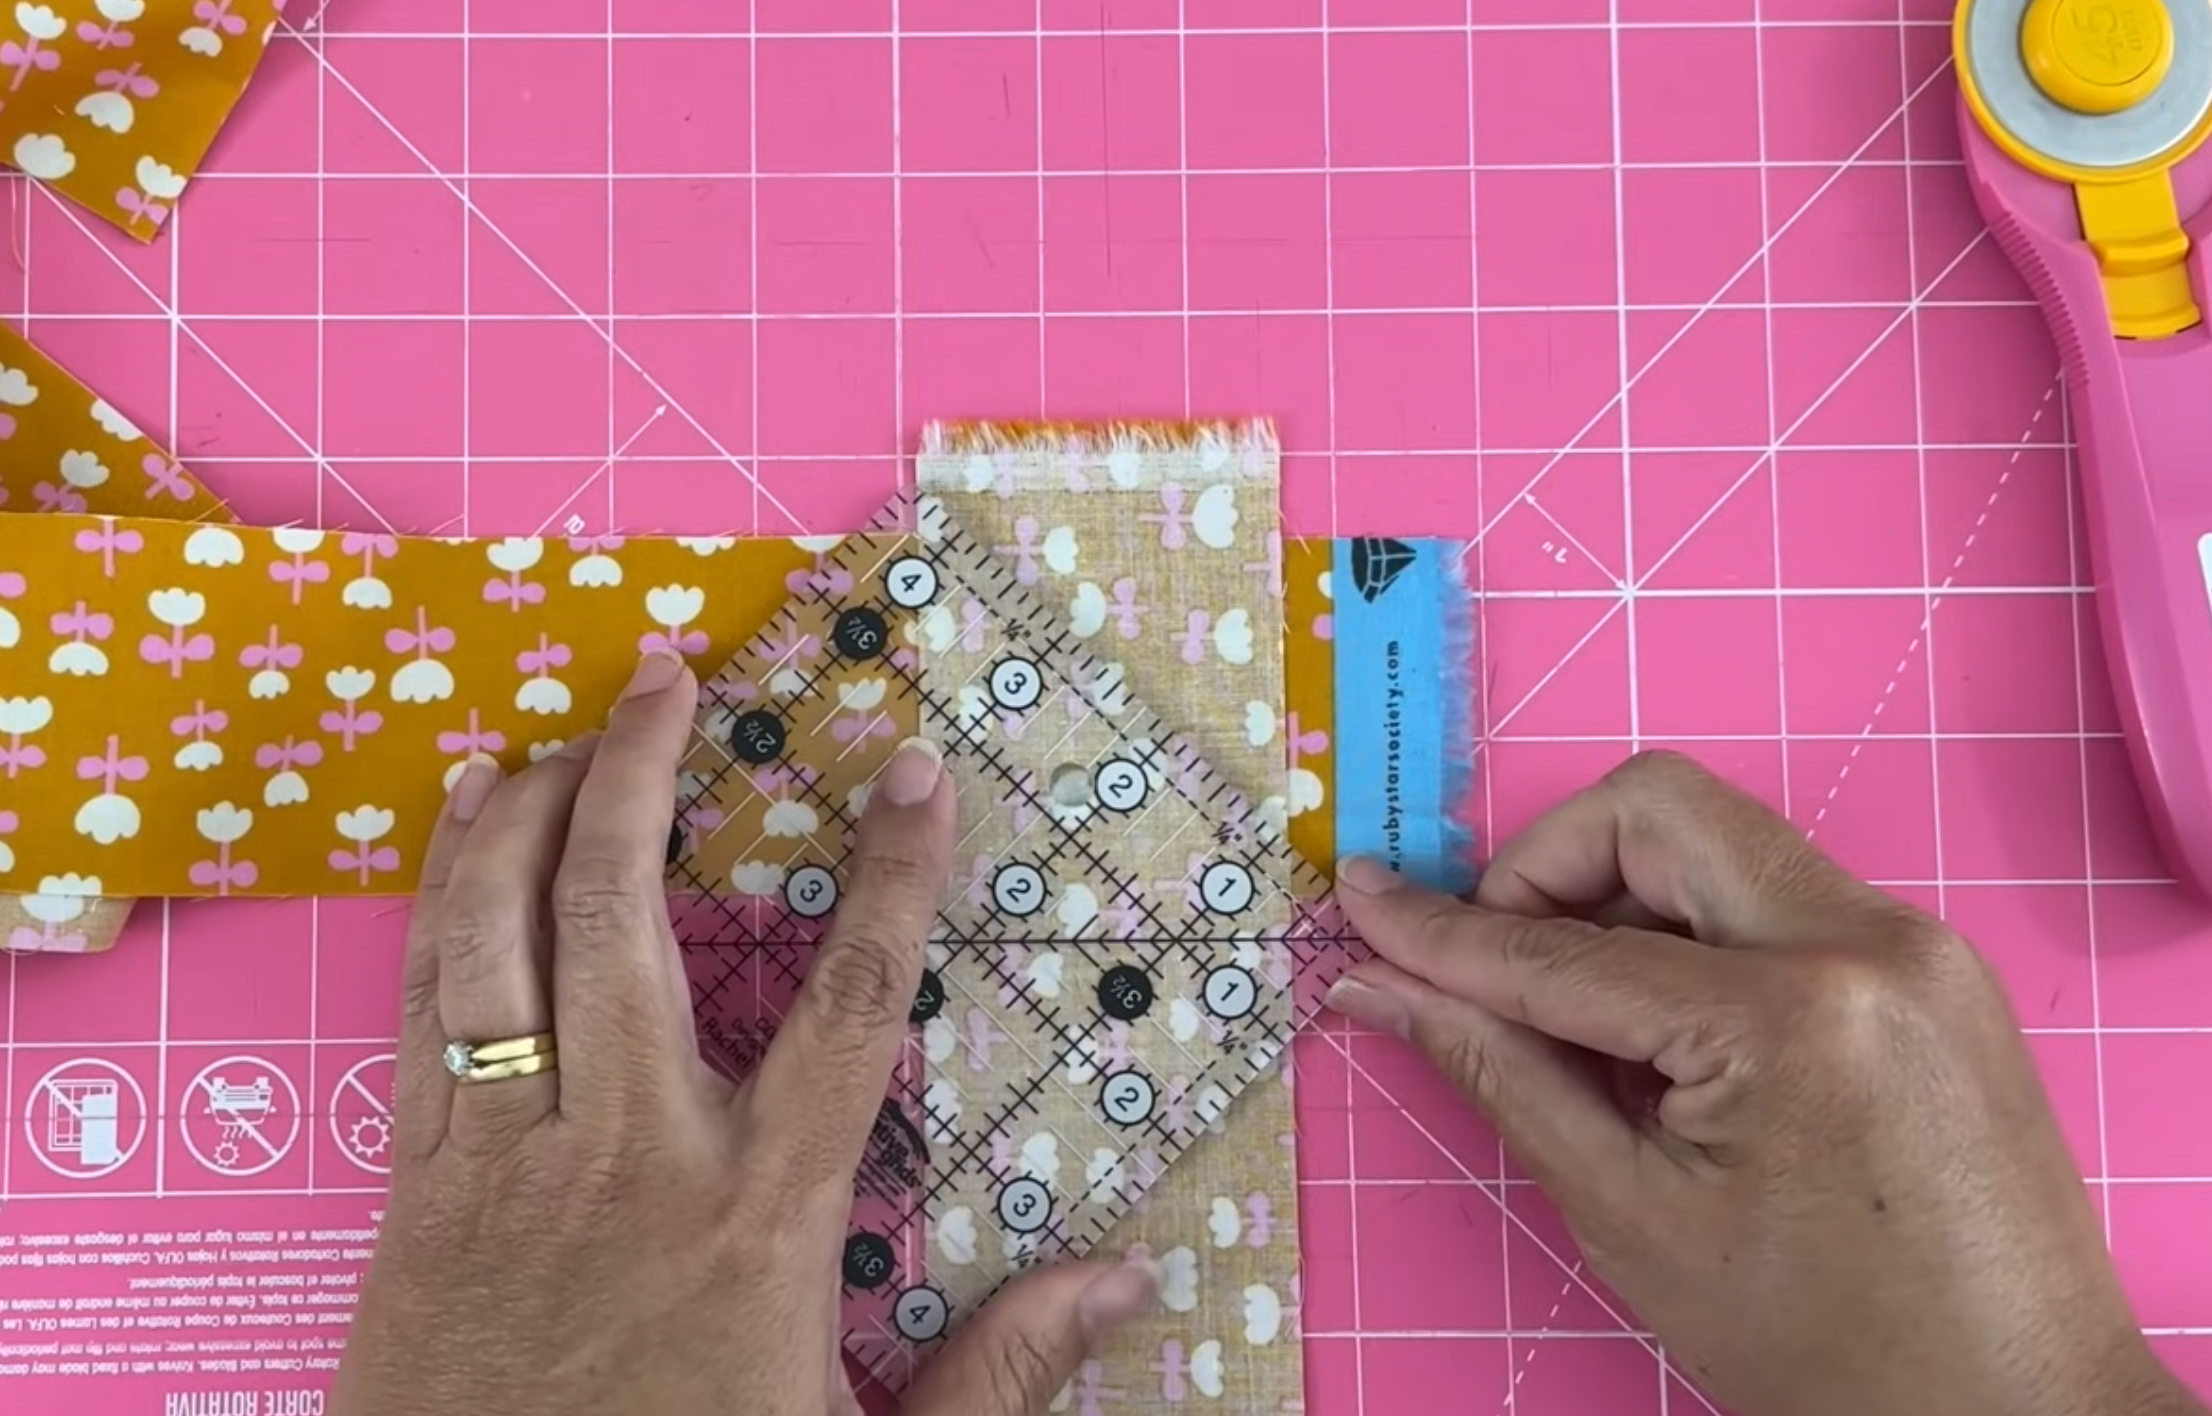
Repeat this for each join until all your strips are sewn into one long piece. If you’re using a directional fabric, just double check it’s facing the way you want before you sew each join.
Step 2: Press the Seams Open
Finger-press each seam open, then give it a proper press. Pressing the seams open, rather than to one side, means that once your binding is folded, those seam allowances get spread across the full width instead of stacking up into a lump you have to sew through later.

Step 3: Prepare Your Starting End
Instead of joining the two ends together on the diagonal at the very end (the traditional, fiddlier way), I finish mine a bit differently: I make a folded-over flap and tuck the other end inside it later on.
- Cut one end of your binding at a 45 degree angle, top right down to bottom left.
- Fold that angled end over on itself, a little more than a quarter inch, generously enough that it won’t work loose later.
- Trim the folded edge with scissors, by eye.

Step 4: Press Your Binding in Half
Fold the whole strip in half lengthwise, wrong sides together, lining up the raw edges, and press. This step isn’t strictly necessary, but it means there’s one less thing to wrestle with once you’re attaching binding to your quilt.

Step 5: Attach the Binding to the Back of Your Quilt
With your quilt already quilted and squared up, work from the back.
- Starting with your folded flap end, line up the binding’s raw edges with your quilt’s raw edges, and open the binding flat to sew the first couple of inches down.
- Switch to a quarter-inch foot (or your walking foot, whatever you’re most comfortable with) and stitch at a quarter-inch seam allowance, starting from the beginning of that fold.
- Fold the binding back over and continue sewing, checking as you go that it’s smoothed flat with no pulling or wrinkles.
- At each corner, stop exactly a quarter inch from the edge, then sew to the corner. Pivoting right at that quarter-inch mark is what gives you those really neat, sharp corners.
- Fold the binding straight up to create a 45 degree fold.
- Then fold it back down in line with the next edge, this creates your mitered corner.
- Continue sewing.
- When you get back around to where you started, sew right up to that point. Then trim your binding on a diagonal so the end can tuck inside the flap from Step 3.
- Tuck it in, make sure it lies flat, pin it, and sew the opening closed.


Step 6: Fold to the Front and Sew It Down
Now flip your quilt over. Press the binding over toward the front all the way around, but skip pressing the actual corners. Fold each corner into a neat mitered point as you go, pin or clip it in place, and stitch it down from the front, about ⅛ inch from the folded edge.
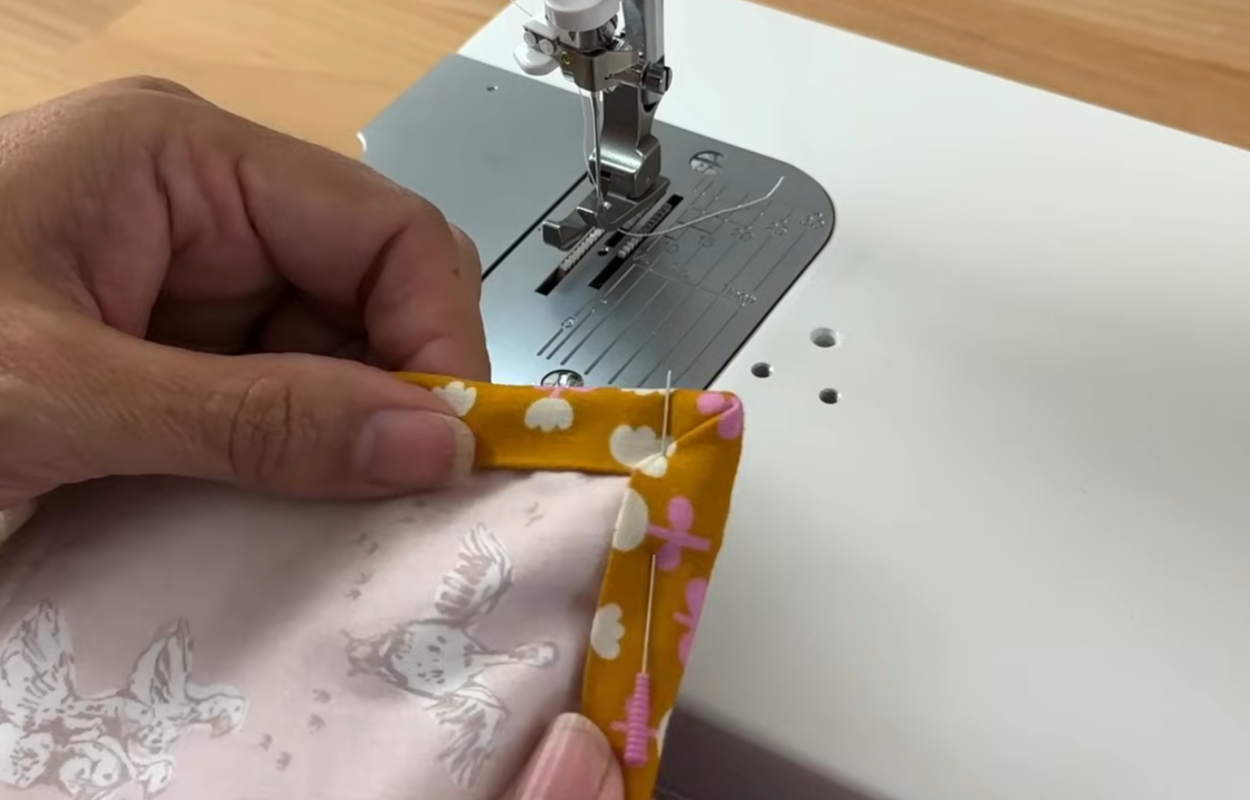
At the corners, stop with your needle down, lift the foot, pivot, and continue.

And that’s it, your binding is done!
A Couple of Personal Preference Notes
The strip width, 2½” vs 2¼”, really is just preference. Use whichever you were taught, or whichever you like once you’ve made a few quilts. And if you happen to have a Juki with a lift compensating foot, it’s a genuine game changer for that final top-stitch, it sits down below the binding’s edge and gives you beautifully even stitching. Any regular foot will still get you a great result though, just stitch about ⅛ inch from the edge.
Watch the Video Tutorial
Prefer to watch it instead of read it? I’ll walk you through every step in the video below. And if you’d like to compare methods, I also have a video on the more traditional way of joining binding ends on the diagonal, you can find it in my Binding Your Quilts playlist. Don’t forget to like and subscribe if you enjoy the video, I appreciate you!
Save This Tutorial for Later
Save this tutorial! ❤️ Want to bind a quilt later? Pin it now to your favorite Pinterest board so you’ll have it saved and ready when inspiration strikes.
Share Your Finished Quilt!
I’d love to see how your binding turns out, please share your work with me! Here’s how:
- Post in the YouTube community HERE.
- Comment in the Facebook group HERE.
- Tag me on Instagram or Facebook using #staceyleecreative
- Reply to my weekly newsletter. Sign up HERE.
Happy sewing!
Stacey x