

My daughter is heading back to college, so I wanted to make her something cute, practical, and personal to take with her. I decided on a fabric covered folder, a fun blast from the past that’s making a comeback.
You may remember decorating folders like these back in the 90s. They were such a fun way to turn an ordinary school folder into something completely personal, and they are just as fun to make today.
You can decorate yours with lace, ribbon, patches, buttons, or anything else you have tucked away. In this tutorial, I also added a little photo frame to the front for an extra personal touch.
The best part is that you don’t need a sewing machine. All you need is fabric, a little batting, and a hot glue gun, and you can finish your fabric-covered folder in under an hour.

Supplies You Will Need
- Ringbinder folder
- ¾ yard of 100% quilting cotton
- Polyester batting
- 2¾ yards of 1½” wide lace
- Card, pencil, and scissors
- Glue gun and glue sticks
Make sure you also have plenty of glue sticks nearby. I used approximately five or six glue sticks for this project.
I used polyester batting because it is a little puffier than cotton batting and gives the folder a lovely, soft finish. I also let Bella choose the fabric herself. If you are making this for someone else, letting them choose the fabric is the easiest way to make sure they will love it.
Cutting Measurements
These measurements are for the standard 1″ letter size ring binder I used. If your binder is a different size, measure it first and adjust the pieces as needed.
Cut the following pieces:
- (1) 26″ × 14″ main fabric
- (1) piece of polyester batting slightly smaller than the fabric
- (1) 11¼″ × 12″ front lining fabric
- (1) 11¼″ × 9½″ back lining fabric
- (1) 5″ × 6″ cardboard photo frame
- (1) piece of fabric approximately 1″ larger than the photo frame on every side
- (1) piece of polyester batting slightly smaller than the cardboard photo frame

Step-by-Step Tutorial
Step 1: Glue Down Your Main Fabric
Lay your main fabric right side down, wrong side facing up, and center your ring binder on top. Place your batting on top of the binder (remember, it’s cut slightly smaller than your fabric on purpose, this makes the next part easier).

Working one edge at a time, run a line of hot glue along the edge of your fabric, then fold it over the binder and press down firmly. Glue a little further in from the edge than you think you need to, this keeps the glue from squeezing out and onto your fingers when you fold it over. Repeat on the opposite side, pulling the fabric taut as you go, you want it snug and smooth, not floppy, but not stretched so tight it distorts the binder either.

Step 2: Handle the Corners
Corners are the fiddliest part of this project, so don’t stress about getting them perfect. Fold your first folded edge over toward the binder, add a small dot of glue to catch it in place, then fold the remaining fabric over on top and press down. You’re working through several layers of fabric and batting here, so it won’t sit as crisply as a single layer would, and that’s completely normal for this kind of project.
Repeat this same process on all four corners, going back over any spots that don’t feel fully secure with a little extra glue.

Step 3: Attach Your Lining Pieces
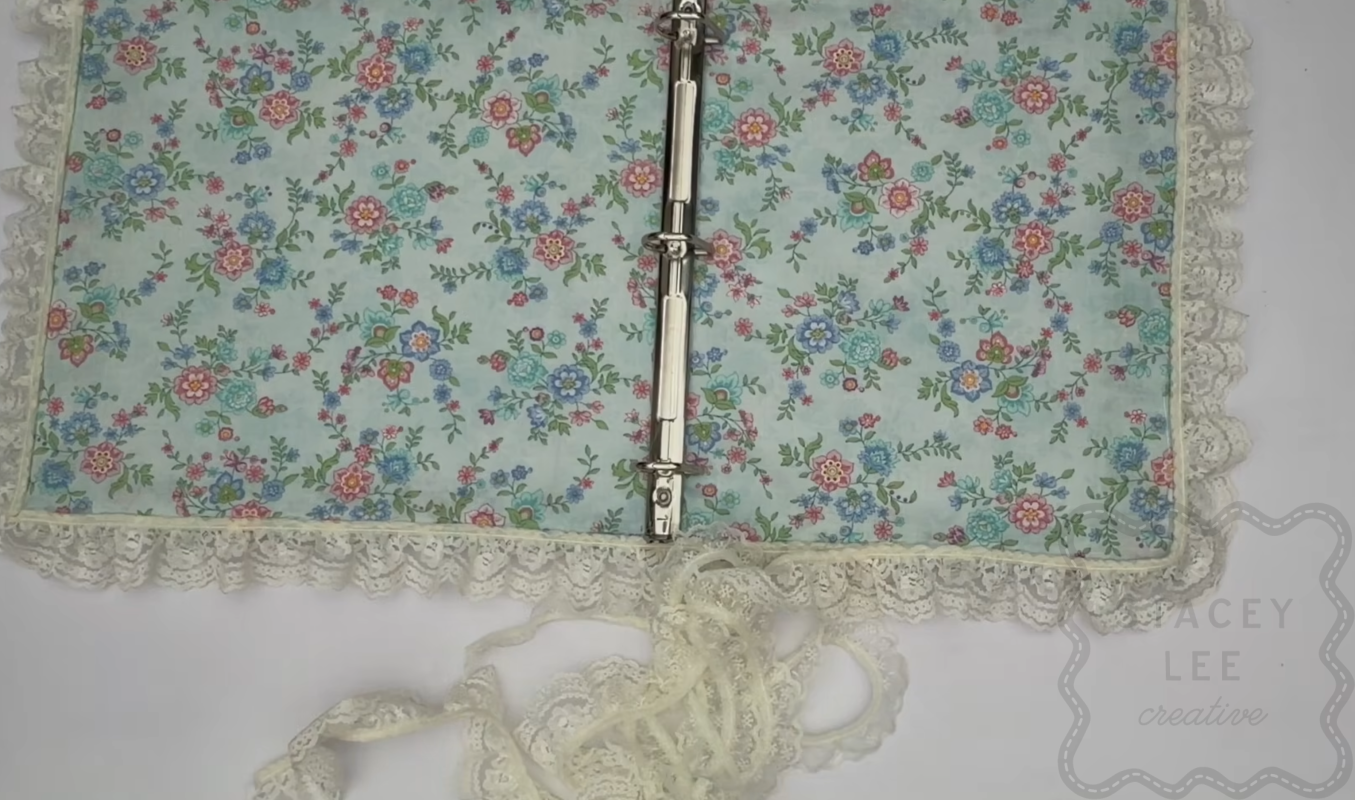
Take your two lining pieces (front and back) and tuck them into place inside the binder, about 1/4″ in from the edges on three sides. The raw edges stay exposed here, but don’t worry, your lace trim covers them completely in the next step.
Working one edge at a time, run your hot glue along the fold line and press the lining down. Take your time on this step, especially near the spine of the binder where things get tighter to work around, small dabs of glue rather than long lines make it easier to control in tricky spots.

Step 4: Add Your Lace Trim
Figure out which side of your lace is the right side (hold it up to the light if you’re not sure), then decide where you’d like your seam to land, the back bottom edge is a good choice since any small overlap there won’t show.
With the right side of your lace facing down, run your hot glue along the raw edge of your folder and press the lace on top, working in short sections since hot glue sets fast. Continue all the way around the entire folder, pivoting gently at each corner rather than trying to turn sharply. When you reach your starting point, trim your lace with about an inch of overlap and glue that final tail down.
Step 5: Make Your Photo Frame (Optional)
This step is entirely optional, you can absolutely stop at Step 4 and have a finished folder. If you’d like to add a photo frame to the front, here’s how.
Cut your cardboard frame shape (Stacey’s free template is linked above, or make your own in any shape you like, round, square, or a rectangle with rounded corners). Center your fabric and batting pieces over the frame and glue the edges down the same way you did with the main folder in Step 1, gluing top and bottom first, then the sides, keeping everything taut but not so tight that it bends your cardboard. Finish the corners the same way as Step 2.
Turn the frame over and cut a hole in the center of the back, about 1/4″ in from your frame’s inner edge, snipping into the corners so the fabric folds over smoothly. Fold each little tab over and glue it down individually, working slowly around the entire opening, and trim away any excess batting first if it’s making the fabric too bulky to fold neatly.

Step 6: Attach the Photo Frame
Once your frame is finished, glue a strip of lace around its edge to match the rest of your folder. Position your frame on the front of the folder (measuring in from each edge with a ruler helps keep it centered, though eyeballing it works fine too), then glue it down on three sides only, leaving one side open so you can slide photos in and out.

And that’s it, your finished fabric-covered folder, personal touches and all.
Watch the Video Tutorial
Want to watch me make this whole thing step by step? Check out the full video tutorial above, and if you enjoy it, please like and subscribe for a new sewing or quilting tutorial every week.
More Ways to Use This Idea
This technique can be used for so much more than a ring binder. You could cover a notebook, journal, sketchbook, photo album, recipe book, or planner using the same basic method. Adjust the fabric and batting to fit your item, then decorate it with lace, trims, or a photo frame to make it your own.